Want to Improve Your Back Workout?
Back workouts used to be the bane of my existence, with progress over the years being very slow and at times, non existent.
From my experience I can say that training the back correctly is without a doubt the hardest muscle group to really 'dial in' the form and training principles with.
Nowadays my back is without a doubt my strongest and most developed muscle group.
Below are 6 tips and alterations I made to my back workots that I attribute to my progress.
1 - Warm Up Your Back Correctly
I never used to warm up my back at all prior to training, I might've done one or two quick static stretches but that was it.
I never foam rolled, performed shoulder dislocations (I recommend doing these before every workout) or did back bridges.
There's no need to go overboard and spend half an hour on your warm up routine...
Simply spend 5 minutes doing the following and you'll find that you're much more fluid on your movements and you're able to get a much better contraction through your shoulder blades on each repetition.
How To Foam Roll Your Back
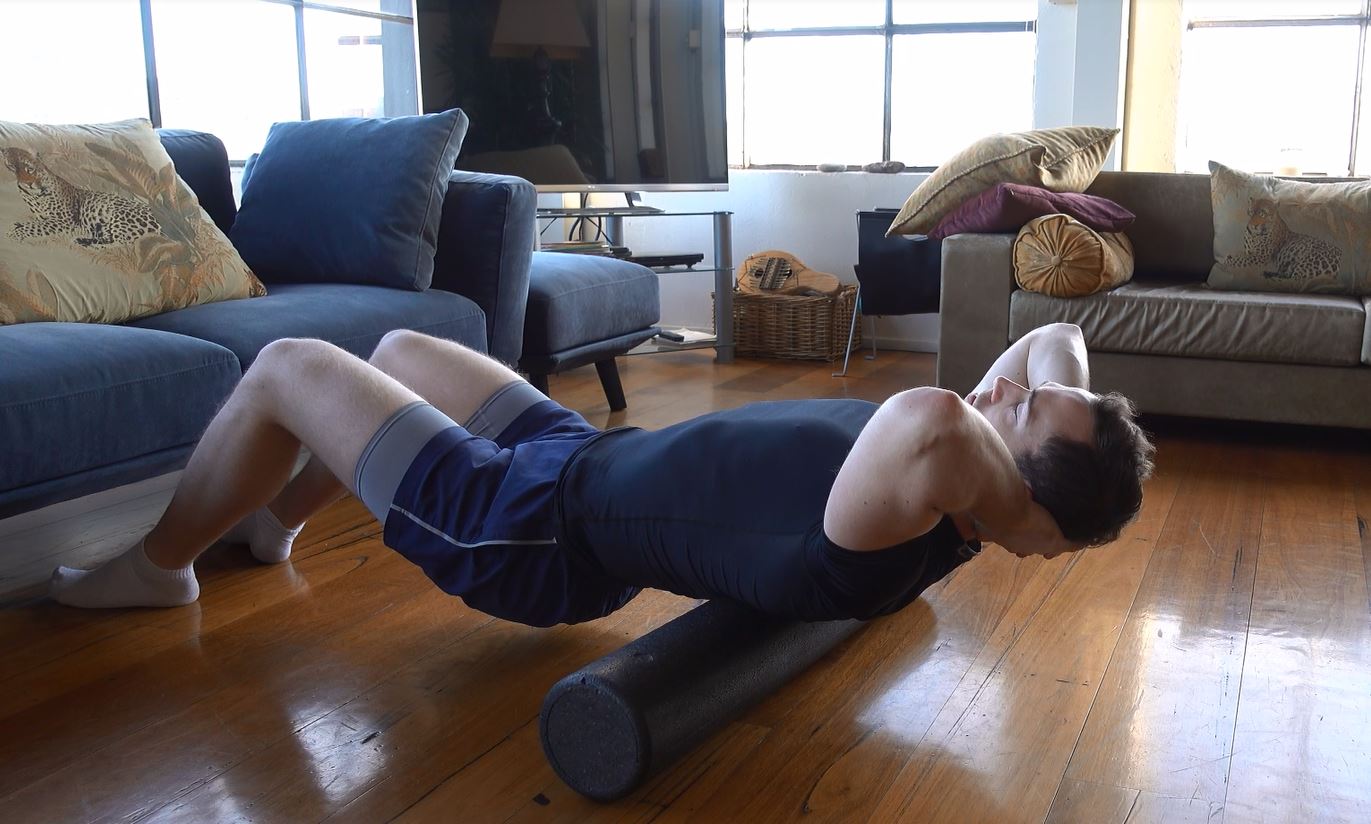
Lay with your back positioned on a foam roller on the floor (under your upper back).
Interlock your hands around the back of your neck to stretch out your back.
Roll up and down your upper back (I do not advise foam rolling your lower back as this can do more harm than good).
Pause for 10~ seconds on any outstanding sore spots as a means of trigger point therapy.
Spend 2 - 3 minutes doing this.
How To Perform Shoulder Dislocations
You'l find my video guide to the shoulder dislocation right here.
Grasp a pole or resistance band with a wide grip (the more you practise these and the more flexible your shoulders become the narrower grip you'll be able to utilize).
For the duration of the exercise squeeze your back muscle and shoulder blades together, maintain a relaxed chest.
Keeping your arms as straight as possible lift above your head until the pole/band touches your lower back.
Bring the pole/band overhead once again and return it to the starting position (touching your thighs) while maintaining straight arms.
Repeat for 3 sets of 10 reps as your warm-up.
Back Bridge Progressions
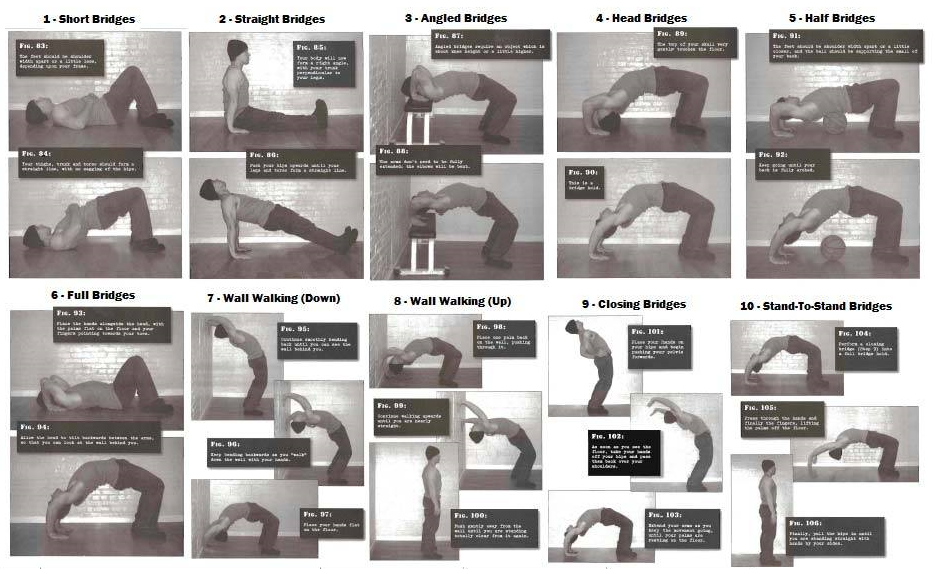
Here’s a great guide demonstrating the progressions from beginner to the master exercise progression shown above utilizing 10 progressions. Remember, the back bridge like any other exercise should be performed for repetitions, not just a static hold. Raise yourself into the back bridge progression, lower yourself down and then raise yourself up for the desired number of repetitions, the static hold often seen when we talking about bridges is the eastern yoga style.
As a warm-up I perform 2 sets of 10 reps (with whichever variation you're comfortable doing).
2 - Use Grips or Chalk

Whether you’re performing a set of barbell rows or weighted pull-ups there becomes a point where you just can’t hold on any longer. The targeted muscle, in this case our back is still good to pump out a few more repetitions… but you just can’t. Perhaps your grip is fatigued from the previous sets, or the sweat is causing your hands to slip.
Grips will not only allow you to grip the bar far longer, you'll also be able to 'feel' the bar just as well as if you weren't wearing grips! Unlike gloves (which often result in bad form and incorrect hand placement due to their sheer thickness) these grips act as if they were a second-skin.
I personally wear RooGrips, but if you don't want to splash out on buying leather grips I recommend using chalk which still makes a huge difference, particularly on your last few sets of pull-ups.
I'd previously find myself ending sets of both pull-ups and rows well before my back was fully fatigued as my hands would slip. No longer.
3 - Increase The Intensity!
If you're doing the same old reps and weight each and every back workout you're not going to progress very far, if it all.
You must create the demand for your back to grow by increasing the intensity.
This means you must either:
Increase the number of reps you're performing
Increase the weight you're lifting
Decrease the amount of rest between sets
Performing 3 sets of 10 reps of pull-ups is great, but without increasing that number (or adding resistance) each workout your back will not develop.
I found this out the hard way - thinking the same exercises with the same reps and weight would allow me to continue to grow.
It won't.
The key to growth isn't a secret... it's progressive overload.
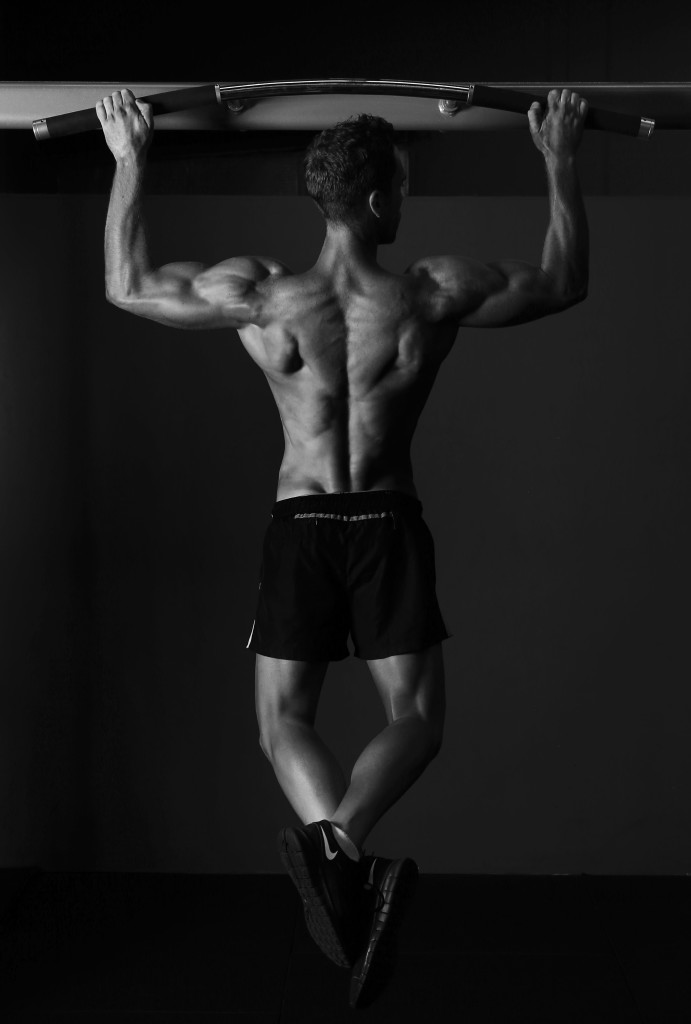
4 - Start With Pull-Ups
I used to start with lat pulldowns and every variation of machine row available, today I prioritize my pull-ups!
Pull-ups are in my opinion are the best back exercise for upper back mass.
If you can’t perform weighted pull-ups perform bodyweight pull-ups, if you can’t perform body-weight pull-ups perform assisted pull-ups or simply jump up and grab the bar while focusing on the negative portion of each repetition.
The only way to get better at pull-ups is to do them! Don’t skip pull-ups simply because you find them a struggle (I recall repping out sets of weighted dips with a 45lb plate before I could even perform 1 proper form wide grip pull-up, so don’t get discouraged!).
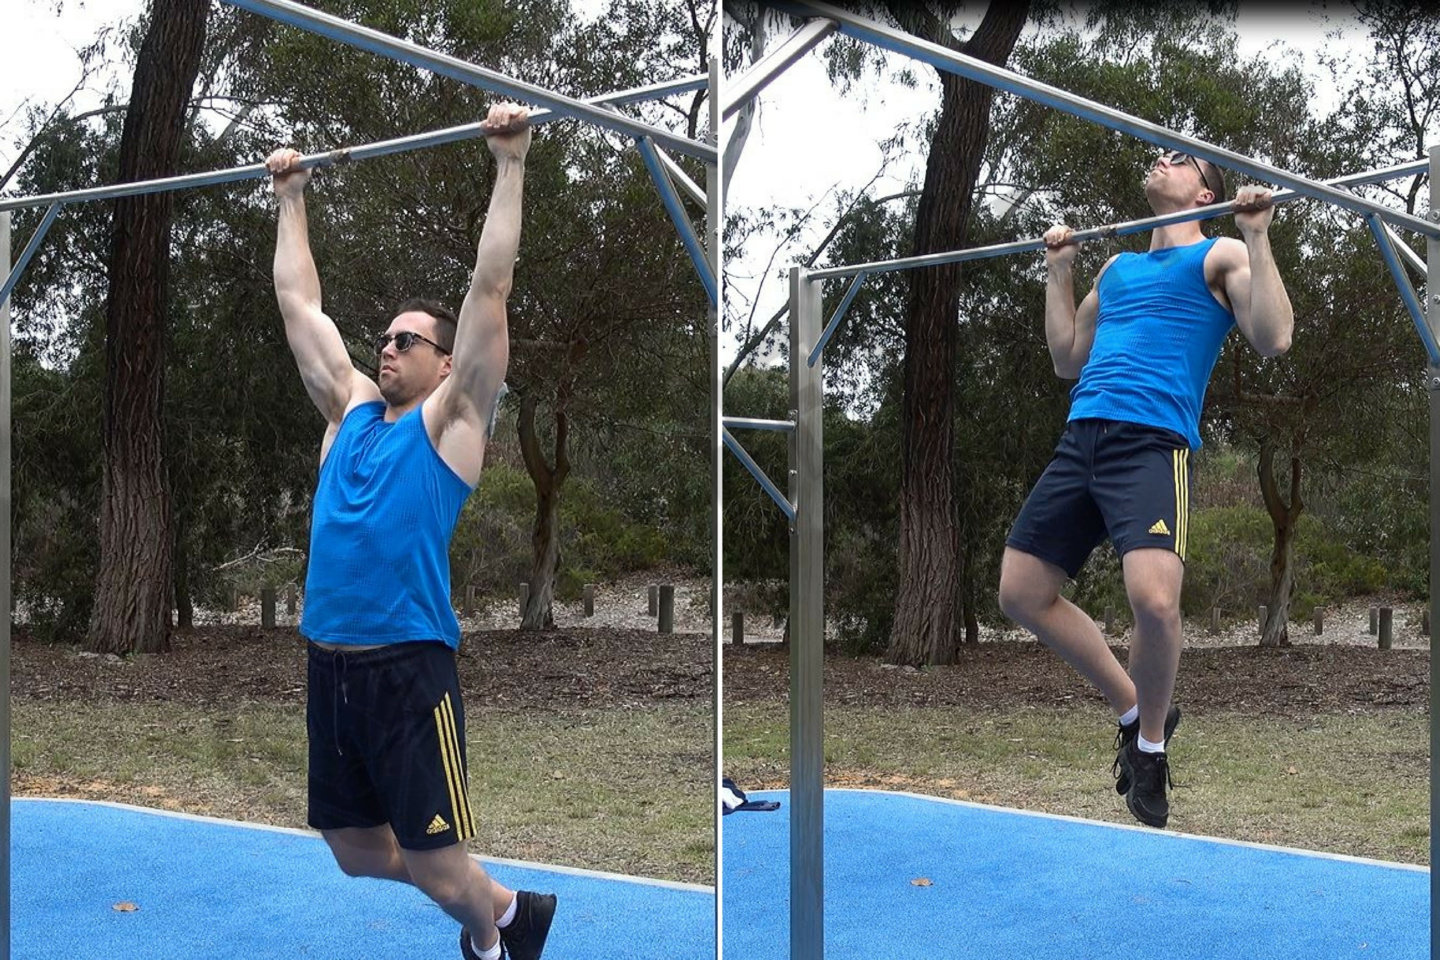
Here's How To Do Pull-Ups Correctly...
With Arms fully extended and slightly wider than shoulder-width grasp your pull-up bar and assume a dead hang position.
Tilt your head to look slightly upward and maintain a small arch in your back, this will create the slight angle you'll maintain in your torso for the duration of the set.
Drive your arms down and back, pulling through your lats until your chin clears the bar.
Slowly lower yourself back down to the dead hang starting position.
Repeat for the desired number of repetitions with this full range of motion.
5 - Swap Out Regular Bent Over Rows For Pendlay Rows

The Pendlay row is a rarely seen yet super effective version of the barbell row.
Chances are you won't find the pendlay row being recommended in bodybuilder magazines, but you will find it being prescribed to athletes by elite strength coaches.
The Pendlay row was named by Glenn Pendlay, an extremely successful olymic weightlifting coach.
The Pendlay row entails starting with the barbell on the ground like a deadlift before rowing the barbell while maintaining your back in an as horizontal as possible position. The Pendlay row, unlike the bent over row is to be performed with strict form and the barbell is to be 'reset' on the floor between repetitions, ensuring you're not jerking or leaning back to use momentum to drive the weight up towards your torso.
How To Do Pendlay Rows
Stand with your mid-foot under the bar, medium stance.
Grip the barbell slightly wider than a regular bent over row.
Maintain a slight bend in your knees, however not too much as you'll be blocking the path of the barbell.
Lift your chest up and straighten your back to assume a position as horizontal to the floor as possible.
Pull the bar towards the ceiling, squeeze as the bar reaches your lower chest.
Lower the barbell back down to the ground in a controlled manner, allowing it to come to a stop on the floor before proceeding with your next repetition.
6 - Focus On The Contraction (Every Exercise, Every Rep)
In order to add size and increase back strength we need to be using our back when we're performing rows and pull-ups.
By default most guys attempt to pull through their arms (especially when lifting heavy) as opposed to their lats... this results in a bicep pump and a half assed back workout.
Using correct form and ensuring you're activating the right muscles requires conscious effort without a doubt.
At the beginner of each set I ensure I lean back and have a slight arch in my back to ensure I'll be driving through my lats to row the barbell or pull myself up to the bar.
Sitting completely upright or hunching forward is a sure-fire way to set yourself up to struggle the weight through your arms.